How to change a particular color in an image?
See answers below instead. Mine doesn't provide a complete solution.
Here is the sketch of a possible solution using OpenCV:
- Convert the image from RGB to HSV using
cvCvtColor(we only want to change the hue). - Isolate a color with
cvThresholdspecifying a certain tolerance (you want a range of colors, not one flat color). - Discard areas of color below a minimum size using a blob detection library like cvBlobsLib. This will get rid of dots of the similar color in the scene.
- Mask the color with
cvInRangeSand use the resulting mask to apply the new hue. cvMergethe new image with the new hue with an image composed by the saturation and brightness channels that you saved in step one.
There are several OpenCV iOS ports in the net, eg: http://www.eosgarden.com/en/opensource/opencv-ios/overview/ I haven't tried this myself, but seems a good research direction.
This took quite a while to figure out, mainly because I wanted to get it up and running in Swift using Core Image and CIColorCube.
@Miguel's explanation is spot on about the way you need to replace a "Hue angle range" with another "Hue angle range". You can read his post above for details on what a Hue Angle Range is.
I made a quick app that replaces a default blue truck below, with whatever you choose on Hue slider.
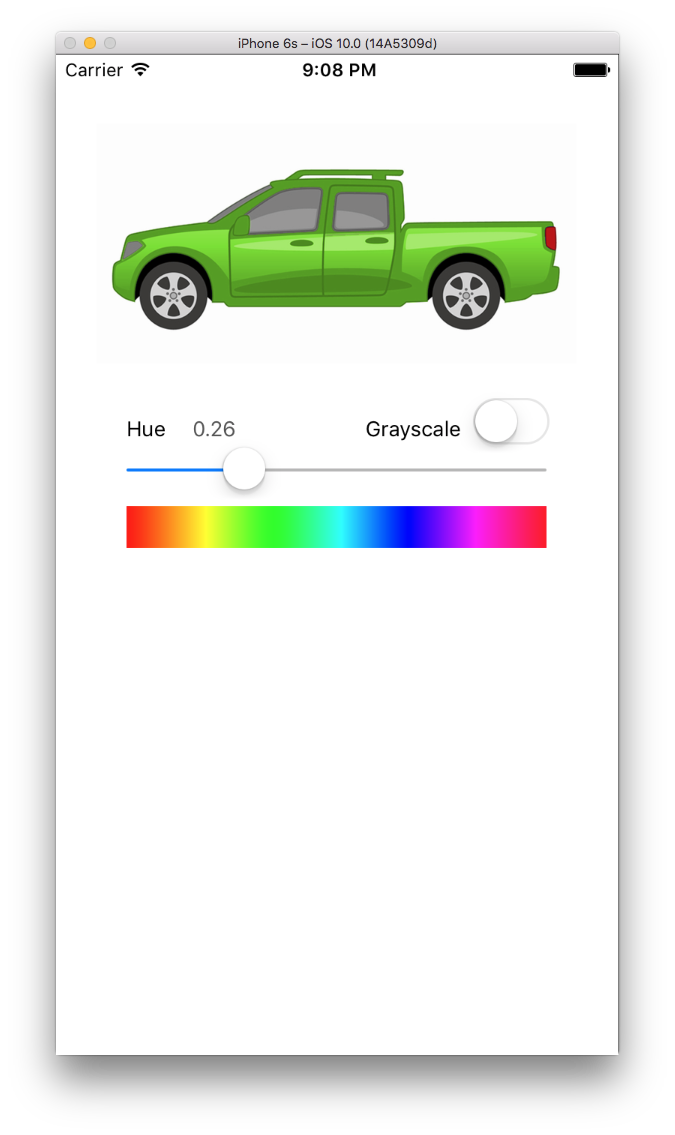
You can slide the slider to tell the app what color Hue you want to replace the blue with.
I'm hardcoding the Hue range to be 60 degrees, which typically seems to encompass most of a particular color but you can edit that if you need to.
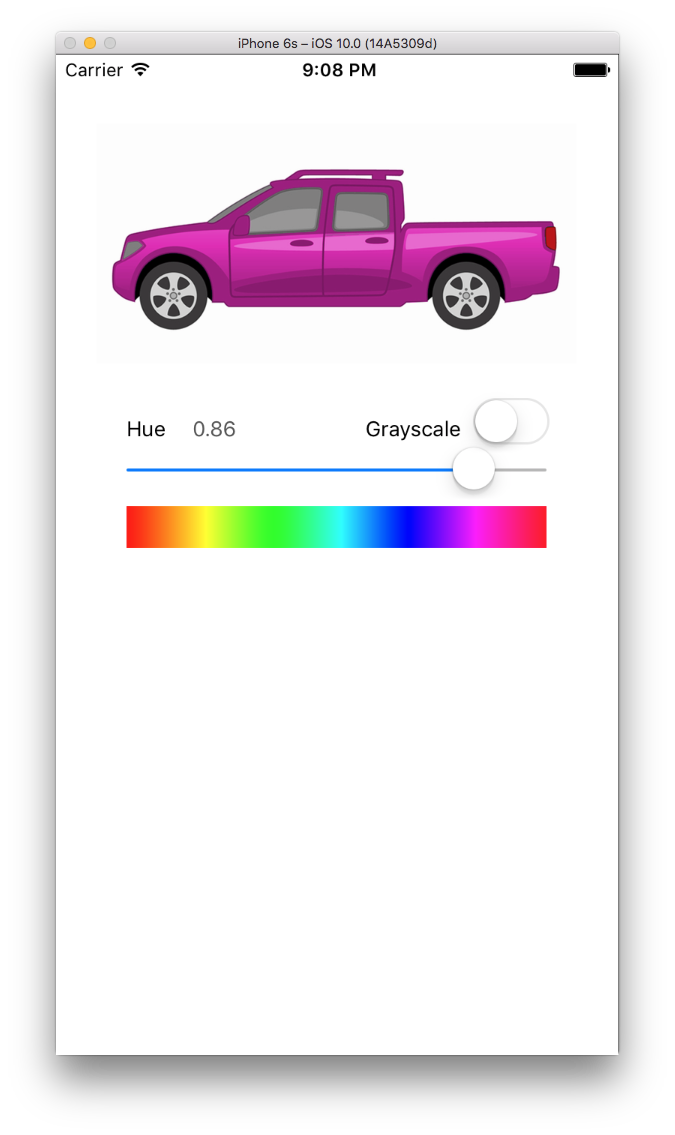
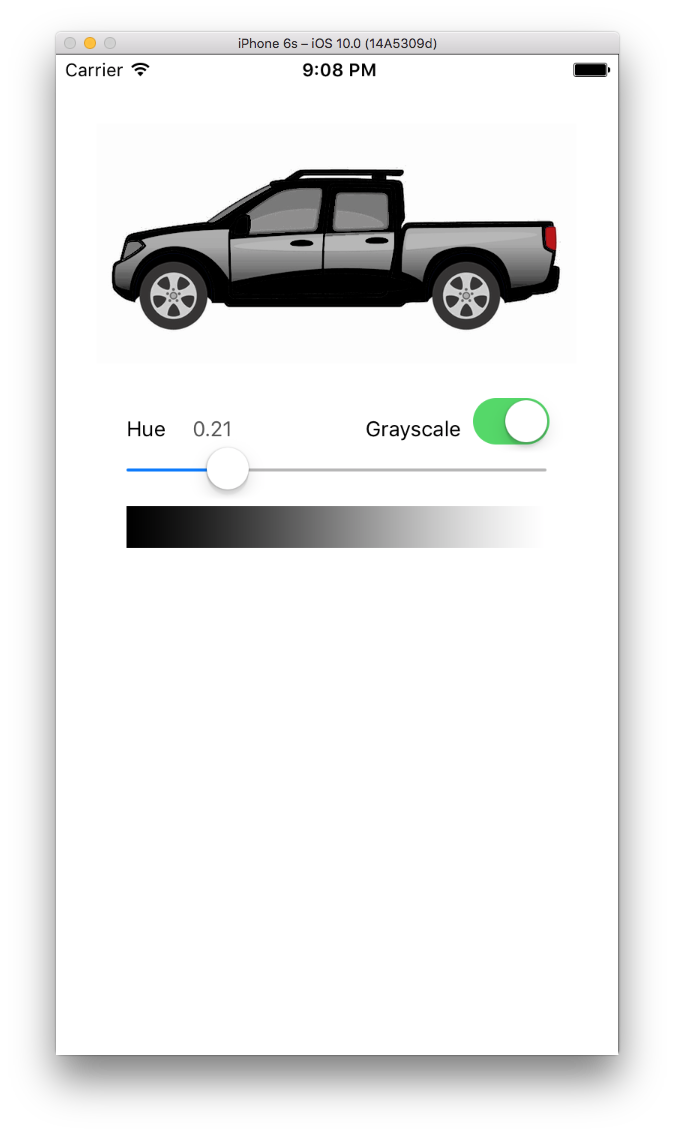
Notice that it does not color the tires or the tail lights because that's outside of the 60 degree range of the truck's default blue hue, but it does handle shading appropriately.
First you need code to convert RGB to HSV (Hue value):
func RGBtoHSV(r : Float, g : Float, b : Float) -> (h : Float, s : Float, v : Float) {
    var h : CGFloat = 0
    var s : CGFloat = 0
    var v : CGFloat = 0
    let col = UIColor(red: CGFloat(r), green: CGFloat(g), blue: CGFloat(b), alpha: 1.0)
    col.getHue(&h, saturation: &s, brightness: &v, alpha: nil)
    return (Float(h), Float(s), Float(v))
}
Then you need to convert HSV to RGB. You want to use this when you discover a hue that in your desired hue range (aka, a color that's the same blue hue of the default truck) to save off any adjustments you make.
func HSVtoRGB(h : Float, s : Float, v : Float) -> (r : Float, g : Float, b : Float) {
    var r : Float = 0
    var g : Float = 0
    var b : Float = 0
    let C = s * v
    let HS = h * 6.0
    let X = C * (1.0 - fabsf(fmodf(HS, 2.0) - 1.0))
    if (HS >= 0 && HS < 1) {
        r = C
        g = X
        b = 0
    } else if (HS >= 1 && HS < 2) {
        r = X
        g = C
        b = 0
    } else if (HS >= 2 && HS < 3) {
        r = 0
        g = C
        b = X
    } else if (HS >= 3 && HS < 4) {
        r = 0
        g = X
        b = C
    } else if (HS >= 4 && HS < 5) {
        r = X
        g = 0
        b = C
    } else if (HS >= 5 && HS < 6) {
        r = C
        g = 0
        b = X
    }
    let m = v - C
    r += m
    g += m
    b += m
    return (r, g, b)
}
Now you simply loop through a full RGBA color cube and "adjust" any colors in the "default blue" hue range with those from your newly desired hue. Then use Core Image and the CIColorCube filter to apply your adjusted color cube to the image.
func render() {
    let centerHueAngle: Float = 214.0/360.0 //default color of truck body blue
    let destCenterHueAngle: Float = slider.value
    let minHueAngle: Float = (214.0 - 60.0/2.0) / 360 //60 degree range = +30 -30
    let maxHueAngle: Float = (214.0 + 60.0/2.0) / 360
    var hueAdjustment = centerHueAngle - destCenterHueAngle
    let size = 64
    var cubeData = [Float](count: size * size * size * 4, repeatedValue: 0)
    var rgb: [Float] = [0, 0, 0]
    var hsv: (h : Float, s : Float, v : Float)
    var newRGB: (r : Float, g : Float, b : Float)
    var offset = 0
    for var z = 0; z < size; z++ {
        rgb[2] = Float(z) / Float(size) // blue value
        for var y = 0; y < size; y++ {
            rgb[1] = Float(y) / Float(size) // green value
            for var x = 0; x < size; x++ {
                rgb[0] = Float(x) / Float(size) // red value
                hsv = RGBtoHSV(rgb[0], g: rgb[1], b: rgb[2])
                if hsv.h < minHueAngle || hsv.h > maxHueAngle {
                    newRGB.r = rgb[0]
                    newRGB.g = rgb[1]
                    newRGB.b = rgb[2]
                } else {
                    hsv.h = destCenterHueAngle == 1 ? 0 : hsv.h - hueAdjustment //force red if slider angle is 360
                    newRGB = HSVtoRGB(hsv.h, s:hsv.s, v:hsv.v)
                }
                cubeData[offset]   = newRGB.r
                cubeData[offset+1] = newRGB.g
                cubeData[offset+2] = newRGB.b
                cubeData[offset+3] = 1.0
                offset += 4
            }
        }
    }
    let data = NSData(bytes: cubeData, length: cubeData.count * sizeof(Float))
    let colorCube = CIFilter(name: "CIColorCube")!
    colorCube.setValue(size, forKey: "inputCubeDimension")
    colorCube.setValue(data, forKey: "inputCubeData")
    colorCube.setValue(ciImage, forKey: kCIInputImageKey)
    if let outImage = colorCube.outputImage {
        let context = CIContext(options: nil)
        let outputImageRef = context.createCGImage(outImage, fromRect: outImage.extent)
        imageView.image = UIImage(CGImage: outputImageRef)
    }
}
You can download the sample project here.
I'm going to make the assumption that you know how to perform these basic operations, so these won't be included in my solution:
- load an image
- get the RGB value of a given pixel of the loaded image
- set the RGB value of a given pixel
- display a loaded image, and/or save it back to disk.
First of all, let's consider how you can describe the source and destination colors. Clearly you can't specify these as exact RGB values, since a photo will have slight variations in color. For example, the green pixels in the truck picture you posted are not all exactly the same shade of green. The RGB color model isn't very good at expressing basic color characteristics, so you will get much better results if you convert the pixels to HSL. Here are C functions to convert RGB to HSL and back.
The HSL color model describes three aspects of a color:
- Hue - the main perceived color - i.e. red, green, orange, etc.
- Saturation - how "full" the color is - i.e. from full color to no color at all
- Lightness - how bright the color is
So for example, if you wanted to find all the green pixels in a picture, you will convert each pixel from RGB to HSL, then look for H values that correspond to green, with some tolerance for "near green" colors. Below is a Hue chart, from Wikipedia:

So in your case you will be looking at pixels that have a Hue of 120 degrees +/- some amount. The bigger the range the more colors will get selected. If you make your range too wide you will start seeing yellow and cyan pixels getting selected, so you'll have to find the right range, and you may even want to offer the user of your app controls to select this range.
In addition to selecting by Hue, you may want to allow ranges for Saturation and Lightness, so that you can optionally put more limits to the pixels that you want to select for colorization.
Finally, you may want to offer the user the ability to draw a "lasso selection" so that specific parts of the picture can be left out of the colorization. This is how you could tell the app that you want the body of the green truck, but not the green wheel.
Once you know which pixels you want to modify it's time to alter their color.
The easiest way to colorize the pixels is to just change the Hue, leaving the Saturation and Lightness from the original pixel. So for example, if you want to make green pixels magenta you will be adding 180 degrees to all the Hue values of the selected pixels (making sure you use modulo 360 math).
If you wanted to get more sophisticated, you can also apply changes to Saturation and that will give you a wider range of tones you can go to. I think the Lightness is better left alone, you may be able to make small adjustments and the image will still look good, but if you go too far away from the original you may start seeing hard edges where the process pixels border with background pixels.
Once you have the colorized HSL pixel you just convert it back to RGB and write it back to the image.
I hope this helps. A final comment I should make is that Hue values in code are typically recorded in the 0-255 range, but many applications show them as a color wheel with a range of 0 to 360 degrees. Keep that in mind!